Menu
Lacing Up: The Intricate Construction and Fascinating History of Corsets
Hello there, fellow sewing enthusiasts! Today, I want to share with you all about one of my favorite projects - sewing corsets!

A Tight History
The corset, also known as a stays or a pair of bodies, first appeared in the 16th century. At this time, it was a simple garment worn to flatten the bust and support the torso. These early corsets were made from stiffened fabric, such as linen or canvas, and were often reinforced with whalebone or reeds.
As the centuries passed, the corset evolved in both form and function. During the 18th century, the corset became more structured and boning was added to provide more support. The shape of the corset also changed, becoming longer and more conical in shape. This was known as the "long line" corset and it was a popular style for much of the 18th century.

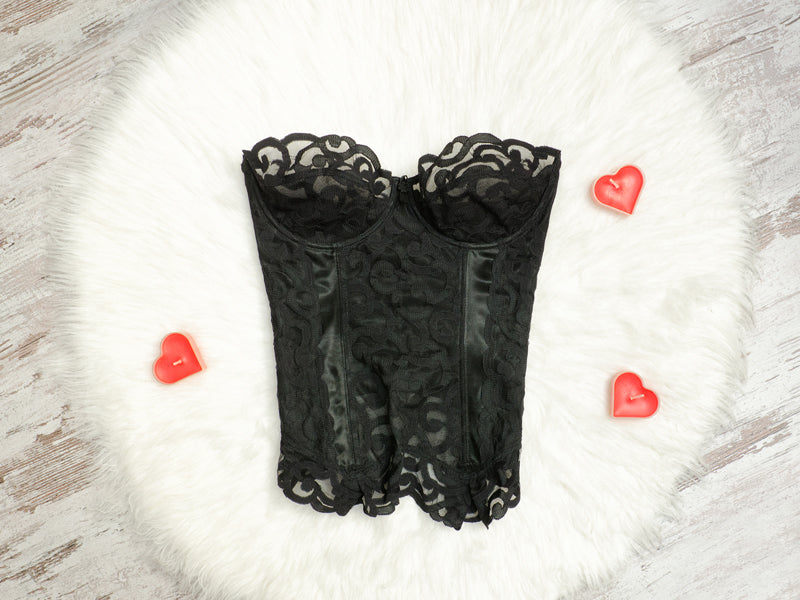
During the 19th century, the corset took on a new level of importance in women's fashion. It became an essential part of the "hourglass" figure that was highly prized at the time. Corsets were made from a variety of materials, including silk, satin, and cotton, and were often adorned with lace and embroidery.
The 19th century also saw the introduction of the busk, a rigid piece of material, usually made of bone, that was inserted into the center front of the corset. The busk was used to help the corset maintain its shape and also provided a straight front for the garment.
In the early 20th century, the corset began to fall out of favor as women's fashion became more relaxed and practical. However, it made a comeback in the 1950s and 1960s with the rise of pin-up culture and the popularity of the hourglass figure once again.

Today, corsets are worn primarily for aesthetic purposes and as a form of lingerie. They have also become a popular accessory in the cosplay and steampunk communities.
Despite its controversial past and sometimes negative connotations, the corset remains an enduring symbol of femininity and beauty. Whether you wear one for fashion, historical reenactment, or just for fun, the corset is a testament to the creativity and ingenuity of fashion throughout history.
Not only are corsets a fun challenge to tackle, but they also offer endless opportunities for creativity and personalization.

The Skinny on Materials
Before we dive into the various materials used in corset-making, let's first discuss the basic structure of a corset. A corset typically consists of an outer layer of fashion fabric, an inner layer of stabilizer fabric, and boning to provide support and shape. Additionally, a corset may feature cups for added support and comfort, as well as channeling and hook and eye tape for ease of wear.
Now, let's break down each of these materials in more detail:
1 Channeling - Channeling is the fabric casing that encases the boning in a corset. It can be made from a variety of materials such as cotton, silk, satin, or a pre-made Nylon channeling you can find in our store. Channeling not only protects the boning from poking through the fabric, but it also creates a clean and finished look. We offer the softest channeling in a huge selection of colors.
2 Hook and eye tape - Hook and eye tape is a fastening system commonly used in corsetry. It consists of a tape with hooks on one side and eyes on the other that are sewn onto the back panels of the corset. The tape makes it easy to put on and take off the corset and allows for adjustability. Shop our selection of hook and eyes.

3 Boning - Boning provides the structure and support of a corset. It can be made from a variety of materials such as steel, plastic, or even bamboo. The boning is inserted into the channeling and sewn into place. Boning not only helps the corset keep its shape but also helps to distribute the pressure of the laces evenly across the body. An essential for the corset project. See out selection of boning here.
4 Stabilizer fabric - Stabilizer fabric is used as the inner layer of a corset and provides support and structure to the garment. It can be made from a variety of materials such as cotton coutil, twill or Nylon like what we offer. The stabilizer fabric helps to keep the corset from stretching out of shape and also provides a smooth base for the boning. A fan favorite stabilizer perfect for your corset project.

5 Cups - Some corsets may feature cups to provide added support and comfort. Cut and sew cups can be made from a variety of materials such as foam, silk, or satin. Or you can choose preformed cups. They are typically sewn into the fashion fabric and stabilizer layers of the corset. Many styles, colors and sizes of cups to choose from in our store.
6 Seam cover - Seam cover is a strip of fabric that is used to cover the raw edges of the fashion fabric and stabilizer layers where they meet. It creates a smooth and clean finish and can be made from a variety of materials such as bias tape, satin ribbon or delicate pre-made Nylon seam cover like what we stock. Check out our seam cover in a variety of colors to match your project.
All Together Now
While it may seem like a daunting task, breaking it down into manageable steps can make the process much more approachable. Here's the breakdown of steps in their most basic form.

1 First, start by selecting a pattern and fabric for your corset. The pattern will guide you through the construction process, while the fabric should be a sturdy material that will hold up to the tension of the corset.
2 Cut out your fabric pieces according to the pattern instructions. Make sure to mark all notches, darts, and seam lines to ensure accurate construction.
3 Next, sew the fashion fabric and stabilizer layers together along the seam lines, right sides facing each other. You can use a regular machine stitch or a flat-felled seam for added durability.
4 Sew the channeling onto the fashion fabric layer of the corset, making sure to leave a small opening at the top and bottom to insert the boning.
5 Insert the boning into the channeling and sew the openings closed.
6 Sew the hook and eye tape onto the back panels of the corset. Make sure to align the hooks and eyes accurately for a smooth fit.
7 Add cups to the corset if desired. These can be sewn in before or after the channeling and boning have been added.
8 Finally, add the seam cover to the raw edges of the corset to create a smooth finish.
9 Try on the corset and adjust the lacing to fit your body comfortably. If needed, you can make small adjustments to the fit by adding or removing boning.
And there you have it! By following these steps, you'll have a beautifully constructed corset that's ready to wear. While the process may take some time and effort, the end result is well worth it. Remember to take your time and enjoy the process - sewing a corset is a labor of love, and the finished product is a true masterpiece.
– Ciao for now!
🥰 Keep in touch! Send messages, Share photos on Instagram @stitchlovestudio, comment, share your experiences.
✍ Sign up to receive news for events, freebies, coupons and sew much more!
- Choosing a selection results in a full page refresh.